Pages - Menu

Showing posts with label coloring. Show all posts

Wednesday, December 25, 2013

Recipe Mini I made

Hey everyone just wanted to share a project I made for my friend!
It was fun to make I used four by six recipe cards as my starting point and inspiration!

here are a few pics! I hope you like it!

This is the front cover I wanted to add a little masculinity to it and a bit of each of the family! I had a blast coming up with a design plan for this mini!


Here is the first page I decorated the inside cover with small removable tags she can add titles or whatever she likes and the insert itself is a recipe card!


Here is a close up of the inside cover! 


Every other page has a pocket on the back to store loose recipes hand written or pulled from a paper or magazine! The other pages have a butterfly with a tag, recipes will slip behind the butterfly as well.


This is the back of the album! I really think it turned out pretty cute! I am so happy that Daniela likes it!


Hope you all have a Merry Christmas and wonderful winter break!

Sunday, December 22, 2013

a decorated gift box

I wanted to send a little something to my son for x mas since he was spending it with his dad. He didn't want me to send the bigger gifts so they will be waiting  here for him when he comes back!

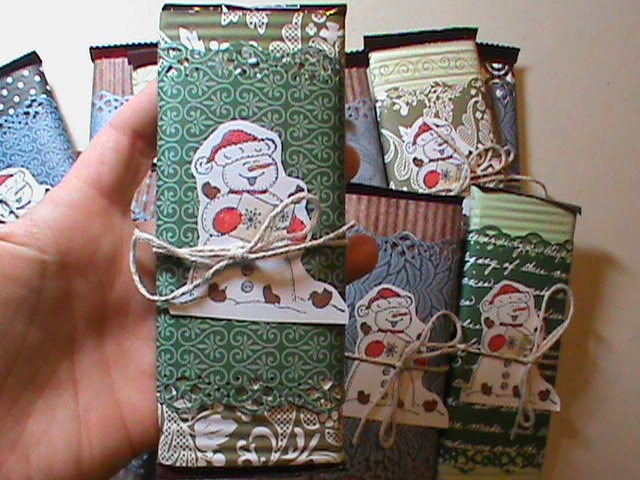
I wanted to make it a little special so I decorated all the flaps and put notes on all the goodies inside! I had to leave a couple unwrapped because they wouldn't fit inside if they were.

It was so much fun and I got to use up some scraps in the process! ;0) If I have time all my packages will be sent like this...I am going to try but I make no promises..lol

Well here is what i did!

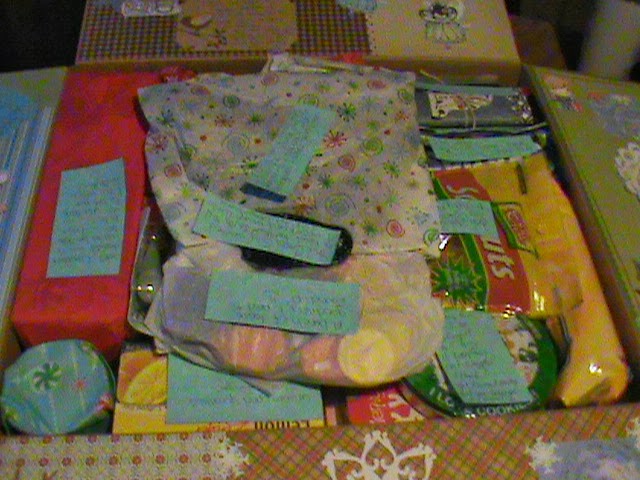
The completed box with all the yummy goodies!


A close up of all the yumminess! lol you can see all the little notes attached to each item! My son said that he really loved all the notes attached, that it really was the best. What can I say we work wonders for our children! lol


Here is the left flap! I used scrap papers mostly DCWV winter stack some images I had colored up! The bottom one in blue my daughter drew! The winter piece is a cut from my cricut.


Here is the top flap! I think it turned out cute! Again scraps and colored images plus each flap I add some tags if you follow them in order they tell a shortened reworked Christmas story! Twas the night before Christmas. 


This is the bottom flap! I think this one may just be my favorite flap! Love it!


And here is the last flap the right side! Here the story ends and We have written a holiday message for him! 
All in all instead of a card, the flaps do all the work! I really am happy with how this turned out!


This package will take him quite awhile to get through! It is packed full and messages on each one! I can not wait to hear from him! We may even facetime/skype while he opens it! lol That may be a long call! haha

I hope you all like it and it gives you some inspiration to dress up your packages to add that special touch! Happy Holidays Everyone!


Saturday, December 7, 2013

stocking stuffers???

Altered Candy Bars

These are great for all ages who doesn't like a little something sweet now and then?
I give these as gifts and also as stocking stuffers.
THey work up quick and are widely accepted and never turned down...
This year I went with a snowman caroling theme. I think they turned out cute.


Here is a close up! I just layered up some paper and ran it through the crimper and used my punches on the edges and colored and cut out the little snowman and tied a  bit of twine around it and called it good. I really think they came out cute.


hope you have a great day!

Thursday, November 14, 2013

Water color picture i made

This was a fun project! I made this on water color paper.
First you pick three colors and water color on a wash (wet paper) leaving some white showing no rhyme or reason just spread on some paint then sprinkle salt here and there. (dots in the paint) the salt actually repels the water colors. (must use good quality water colors for it to work well). 

once the paper is dry usually overnight. You draw on your images, try to make them flow as if one design not separate ones. (make them grow from one another) Make sure that they are the same subject coming from within you. mine are dragons and myself each is a different type of dragon. The wyrm or baby from present day, the second is the medieval dragon of past and then the tribal dragon of the ancients. They are also from different cultures. But I will not go into that. lol

Sorry I'm sure you don't want a cultural, art and history lesson lol.
Next you ink the image and color them but not completely you want the water color to show through so it is like almost a thought or wispy dream like. Best way I can explain it.
I drew in with my Pitt pens some black and gray flames licking up from the base of the photo, like a burning passion. All art speaks what does this say to you?


Would love to hear your thoughts. Hope you like it!

Happy crafting!


Tuesday, November 12, 2013

Charcoal picture


This picture was made by using a charcoal stick. Which is compressed charcoal. You use a razor blade to shave small particles on a piece of paper and a set of blending stumps to shade the picture, in this case a banana pepper. There is no fine line drawing like for coloring book images or digi's the shape is created by shading not staring with a sketch but a blank paper and charcoal shavings.

This is very time consuming but very relaxing. I love doing projects and pics like this.

the white areas are the paper showing through where no charcoal is, the only color you use is black. the blending tools help achieve the various gray hues.

Charcoal projects have to be sealed so the charcoal does not rub off. I use working fixative this way if I want to go back and add more I can!


I hope you all like it! 
Please  let me know what you think, or questions in the comments! 

Happy crafting!


Friday, November 8, 2013

Christmas simple card share

Hi everyone!

I have been really busy, working up some holiday cards to hand out to family and friends. I wanted to make some simple ones to hand out last minute if need be. Sometimes we have unexpected visitors for the holidays and I like to keep a few extra gifts on hand just for that reason so I need some cards to go with them. 
These are super simple but pretty. I used scrap papers for the background DCWV chrsitmas stack and cut a strip about 1 inch to go across the center and fussy cut a poinsettia for the center. super quick and fun.


These next ones I decorated the envelopes and added a piece of cardstock matted with a 1 inch strip and candle stamp which I colored up with my spectrum markers. These are great to have on hand for extra little gifts. you can easily slip a gift card in with the card!


These are the same as above but they have a poinsettia sticker in their center. I love how easy these work up, that you can use your scraps and those left over envelopes.


Here are two cards I made for two ladies on YT I layered up some winter papers from DCWV, used some snowflakes from my fiskers punches with bling in the centers and I colored the image with my spectrum noir markers. The stamp is from a magazine I purchase.


I hope you all like them!

Happy crafting!

Wednesday, October 30, 2013

Cute mini inspired by a friend on YT

I have seen these minis in the past and I have made a few but I have gifted them all away...So when I saw a friend making these I was motivated to get back into making them! They are quick and easy to make!

If you need a quick gift and have little time these babies are the answer! lol I made two of these In one night just a few hours most of which I was picking out the paper and embellies.

I already gifted them away but I was able to get my daughter to lend me hers so I could take pics for you all! I used scrap papers all DCWV I believe and colored Cheshire and Alice bean with my spectrum noir markers!

The stickers were from my stash I have had them awhile so not sure of the company. I crochet so I made a flower with a river pebble in gren for the closure with velcro and the ribbon is from walmart.

I made all the tags with various studio g basic gray stamps and miscellaneous stickers. Die cuts are from my cricut carts. I used my distress inks to add some depth.

My daughter loves it ad I hope you all do too!

The front


one side open


The opposite side open


Some of the tags


The back


Simple quick and sweet, this mini can hold a good amount of pics and journal spots. great for a event!

Happy Crafting!

Thursday, October 24, 2013

Date night mini using 3 digi's!

I wanted to make a special little mini for a small event like a one night outing! Like date night! lol Anyway this is what I came up with!

I used white card stock from recollections and paper from my scrap stash. (trying to use it up) I hand wrote the title and added a little bling. I wanted to keep it flat so I can tuck it away if I wanted. The first image is Dancing elegance! I love her little fan. i colored her up with my spectrum noir markers.


here I just added some scrap papers and die cut the flower from sizzix set stamp and die, made a belly band from paper stip and tucked in to ticket journal spots that  inked with vintage photo distress ink.


I added more scrap papers and my digi ready for the mall and shopping bag. I colored both with spectrum noir. I added some ticket stubs and a receipt I can fill out later.


This is just like the second page above just reversed the page sides! ;0)


Here I added scrap papers and my digi Does this make me look fat? lol Love her! I tossed in a couple ticket stubs and ticket journal spot! She was colored with spectrum markers also.


And this is the back I left plain so it will lay flat. I wrapped lace around the binding to finish it off!


If you are intersted in the colors used or my digi's head over to wicked designs by brenda

have a great day!

Wednesday, October 23, 2013

Quick card share

Hello everyone! I just wanted to share a card  I put together to send off in a package. It is already on its way so I figured it was ok to put it up! 

I used some scrap papers from my stash, a true living card base some houndstooth ribbon from a friend on YT Thanks hun! I also used stamps from studio g and embossed the skull image on the front with black embossing powder. 


On the inside I used a sentiment from studio g and my bottle digi I made and hand drew on the swirly design releasing from the bottle. I colored the bottle with my spectrum noir markers.


I think it turned out pretty cute! Hope you all have a great day! Thnaks for stopping by!

Tuesday, October 22, 2013

Halloween Card featuring Frank n Couple my new digi set!

I love this cute couple! they were a blast to draw up and color! It was pretty easy I based them off my hubby and I. Well, not the high hair...well in the 80's i had high hair! but not a beehive lol! This is definetly our style though, even our colors!

I made this card for my hubby. I new he would like it and I hope you all do too!

I used David Tutera sparkly card base in red. I used my sizzix ticket die to cut out my digi. I colored them up using my spectrum noir markers and added some stickles to the red on their clothes.
I stamped the sentiment in memento tuxedo black ink, (only one from them I have) ;0(  The stamp is fiskars- friends forever quotes set. I also used some rhinestones, lace and ribbon from my stash, the key and heart lock are cricut cuts i had laying around I needed to use up and thought they went well.


If you are interested in the colors I used please check out my digi blog shop!

Hope you all like it! Have a happy crafty day!

Thursday, October 17, 2013

Halloween card Featuring Devious Debbie!

I wanted to make a trick or treat card for a bit now, but I wasn't sure which digi to use but when I was looking through them all Debbie stood out! I was like yep she is the one! lol

She has just the right amount of sass! (what's a good trick if I don't like the treat...) lol yes I think she is thinking that! just perfect for the card I wanted to make.

I used a white card base and layered up some scrap papers (from a recent mini album), a doily I cut from the paper collection DCWV Heirloom and Tattered time (used both stacks) Two banners are from left over scrap papers also, I stamped trick or treat one the white one with memento tuxedo black ink.
I added 3 flat back pearls in orange and a sweet little pumpkin (cricut cut).

Devious Debbie is darling I think, I colored her in pumpkin colors if I had to title this card I think I would call it "Devious Debbie Does Pumpkin all grown up!" lol anyways here it is!


If you would like to purchase her or any other digi's, or even like to know the colors I used please check out  http://wickeddesignsbybrenda.blogspot.com/

Have a great day!

Tuesday, October 15, 2013

Fall tag featuring you're so sweet digi

This is the second Tag I have ever made. So please be kind, The first was for a friends challenge on YouTube. I think it turned out pretty cute.

I had a good time making it, and it is a plus because I used up some scraps to do it! I cut a piece of orange cardstock for the tag, some chevron halloween paper to lay on top and I used my martha punch on the sides, a purple flower die cut I had laying around some nylon leaves and orange flower from my stash a brown button some trims a brown pompom and cream crochet one.

I took my white gel pen and did some faux stitching on the die cut and the tag base, I also hand wrote happy fall.

My digi you're so cute, looks so cute! I colored her up with my spectrum Noir markers and popped her up on dimensionals.  Over all I think it turned out pretty darn good. lol but you be the judge let me know what you think!


If you are interested in the colors I used or purchasing this digi or any of the others please visit http://wickeddesignsbybrenda.blogspot.com/

Happy crafting!

Thursday, October 10, 2013

new card featuring witching hour

I love this digi so much! She is adorable, and really fun to color up!

For this card I used a studio g card base that is  5 by5, some colorbok fall paper, some yellow circles I had in my stash cardstock, a tree cricut cut  and some orange cardstock from colorbok with a sentiment stamp!

First i adhered the packground paper down, then I glued a bit of orange scrap cardstck to the back of the tree cut out to make the face pop off the paper! I added a little orange glitter glue to the eyes to make it look as if  it is lookingat you! Then I inked the yellow circles with vintage photo distress ink and layered them up with pop dots and adhered them on the card base then placed the tree over it  the sentiment is popped up and so is Witching hour! Love the dimension this card has!

I went back and added a little yellow glitter glue to the moon! For a little sparkle!

I really love this card! It may be my new Fave! Hope you all like her! for the colors I used and to buy her check out my digi blog!


Have a wicked great day!

Tuesday, October 8, 2013

Linda Loo card share

Here is a tag card i made using my digi image Linda Loo! I had a lot of fun creating this card!

I used a cricut cut I had in my stash and stamped congratulations on it (fiskars stamp) with memento tuxedo black ink and rubbed studio g teal ink around its edges to make it pop more, colorbok paper for the packground and some lace trim and ribbon from my stash!

I colored her up using my spectrum noir markers. adhered it all down and called it good!

if you are interested in this digi or the colors I used check out my digi blog!


Have a fabulous Day!

Friday, October 4, 2013

DT project for Wicked designs my digi shop!

I really wanted to make my son a mini album. Each summer I do but we always need more room for our Fall pics so for his birthday I decided to make him this one! Let me know what you think!

The images I used are Johnny Hawk, lined pumpkin and chest but I have not made chest a digi for sale, not yet at least!
If you would like to know what I used please stop over http://wickeddesignsbybrenda.blogspot.com/
I will have it all posted!

Front cover It is in blues.


untie the ribbon and flip left side back!


Now flip right side back!


Again flip right side back!


Now flip through the traditions section  the top and bottom at the same time!


I also have a video posted on my Youtube channel! 
Hope you like my mini!

Thursday, October 3, 2013

Card made using First time flyer digi

I really love how this card came out! I am pleasantly surprised to say the least!

When I thought her up I had this card in mind! Maybe not these colors or this paper but the general idea at least!

I used a ornate studio g base and some scrap DCWV paper from the spring fling stack a cricut cut the little pumpkin which is her little candy pail! and some stickers gifted from a god friend! I colored her using my spectrum noir markers, I really love these markers They are awesome! I can't seem to stop playing with them!

If you would like to buy her or see the colors I used please head over to my digi blog! Be sure to pick up any in the retired section while you can they will be gone for a year at least if not for good!


Hope you all like her and have a great day!

Tuesday, October 1, 2013

Card share featuring my digi Eighties Love

Hi everyone just wanted to share a quick card i made. It is clean and simple, and quick to put together!

I have been having a great time making cards like crazy! I am really building a collection! I am addicted! lol

I started out with a studio g scalloped cricle card base. Love the shape!  I used my martha stewart circle cutter to cut two circles for the background. DCWV paper stack scraps spring fling a fiskars sentiment stamp and my spectrum noir markers!

I listed the colors I used on my digi blog if you are interested in them or purchasing the digi!


Happy Crafting!


Quick card share for a friend

I made this card for a friend here on YouTube she is having her very first giveaway! Yay! you can find her and all the details on her YouTube channel Joandmike0927   I had such a fun time making the card.

I used Darice cardstock in white stamped that with a medallion stamp all over to make my own patterened paper. I used tuxedo balck memento ink. I layered ticket cuts from my sizzix die and popped on my Digi image Java Queen and a little trim!  I colored Java Queen with my spectrum noir markers. It was so fun to create! I  did do the inside of my card but I forgot to take a picture of it.

If you are interested in the colors I used check out my digi blog 


Or if you would like to see the inside of my card I posted a video on my YouTube Channel!

There is a link to my YouTube videos in the left side of this blog.


Have a great day everyone!